-
代码格式化插件 format.nvim
前因
最近,我在 Reddit 上面分享了一个新的代码格式化的插件 format.nvim, 回复大多是是在问为什么要做这个插件以及跟现有插件的区别。
在 SpaceVim v2.3.0 之前,一直使用的代码格式化插件是 neoformat, 这个插件是使用 Vim 脚本写的,同时支持 Neovim 和 Vim。 但是美中不足的地方是这个插件执行格式化命令是调用 Vim 的
system()函数,当命令执行消耗时间很长时,就会卡住界面无法进行下一步操作。 我也尝试过给 neoformat 增加异步支持,但是最终还是决定重新开发一个插件, 主要市考虑到以下几个原因:- Lua 尤其是 luajit 速度相较于 Vim 脚本要快很多,相关比较文章可以查看我前面写的使用 Lua 重写 SpaceVim 内置插件和Vim9Script 与 Lua 的速度比较
- 做一个格式化插件的框架,尽可能减少默认的 formatter,提供接口自行定义。
- 不需要太过复杂的功能,仅仅是异步执行指定命令并更新 Neovim 缓冲区。
其实 neoformat 的插件代码实现逻辑还是非常好的,因此我也是参考了 neoformat 的实现逻辑, 使用 Lua 来实现了这个异步代码格式化的插件 format.nvim。 这个插件使用了 SpaceVim 的 job api 可以异步执行格式化命令,使得 Neovim 的操作更加顺畅。
插件的安装
可以使用任意插件管理器,比如nvim-plug来进行安装:
require('plug').add({
  {
    'wsdjeg/format.nvim',
    cmds = { 'Format' },
    depends = {
      { 'wsdjeg/job.nvim' },
      { 'wsdjeg/notify.nvim' },
    },
  },
})
对于 SpaceVim 用户来说,只需要在启用 format 模块的时候,指定格式化方法为 format.nvim 即可,配置如下:
[[layers]]
  name = 'format'
  format_method = 'format.nvim'
自定义 formatter
以 Lua 语言为例,设置使用 stylua 命令进行格式化:
require('format').setup({
    custom_formatters = {
        lua = {
            exe = 'stylua',
            args = { '-' },
            stdin = true,
        },
    },
})
插件的使用
- 格式化整个文件
format.nvim 只提供了一个命令
:Fromat, 执行该命令时就可以根据当前文件的文件类型选择对应的 formatter 对整个 Buffer 进行格式化。- 选中区域进行格式化
:Format命令支持指定区域进行格式化,因此可以在 Neovim 中选中几行代码进行格式化。- 指定文件类型
通常执行
:Format命令时,会读取当前 Buffer 的 &filetype 选项,但是如果需要指定其他文件类型,比如 java,可以使用如下格式执行命令::Format! <filetype>- 指定格式化工具
如果一个文件类型有多个 formatters,可以在执行改命令时指定一个 formatter 的名字,比如
:Format prettier- 同时指定文件类型、格式化工具,比如选中 markdown 内一段代码块进行格式化:
:Format! <filetype> <formatter>Markdown 代码块格式化
前面提到
:Format命令支持指定区域格式,这里需要借助一个插件 context_filetype.vim。 通过这个插件获取到代码块的区域和文件类型,传给 Format 命令。以下示例使用
<Leader>f格式化光标所在的代码块:function! s:format_code_block() abort let cf = context_filetype#get() if cf.filetype !=# 'markdown' let command = printf('%s,%sFormat! %s', cf.range[0][0], cf.range[1][0], cf.filetype) exe command endif endfunction nnoremap <silent> <Leader>f <cmd><sid>format_code_block()<cr>
-
在 SpaceVim 中使用卢曼卡片盒笔记法做笔记
起因
前段时间整理自己的个人维基发现笔记太零散,很难快速定位到自己需要的笔记。 以往借助自己的 flygrep 插件根据记忆的关键字倒是可以找到相关的内容, 但是随着笔记越来越多,关键字筛选已经不足以快速定位了。 于是就想找一个更好的方式来组织管理日常的笔记,后来就了解到了《卢曼卡片盒笔记法》
基于 Neovim 的 zettelkasten 插件
最开始,我是想找一个三端(手机、电脑、网页)同步的笔记软件,但是似乎没有合适的。因为都是文本编辑,而且如果要使用卡片盒笔记法的话, 那么笔记就需要遵循一定的格式。日常使用 Neovim 也非常多,几乎文本的编辑都是在 Neovim 内完成的,索性就不再舍近求远去找笔记软件了, 就直接在 Neovim 内完成。检索了下 Github 发现还是有不少现成的插件实现,但是功能似乎都不是很完善。
因此自己 Fork 了一个插件,在这个插件的基础上做了一些功能的改进和增加,有兴趣的话欢迎尝试:vim-zettelkasten。
基于 Tags 的 ZkBrowser
浏览笔记列表时,展示笔记的引用数量以及被引用数量,同时列出笔记包含的 Tags 列表,如下图所示:
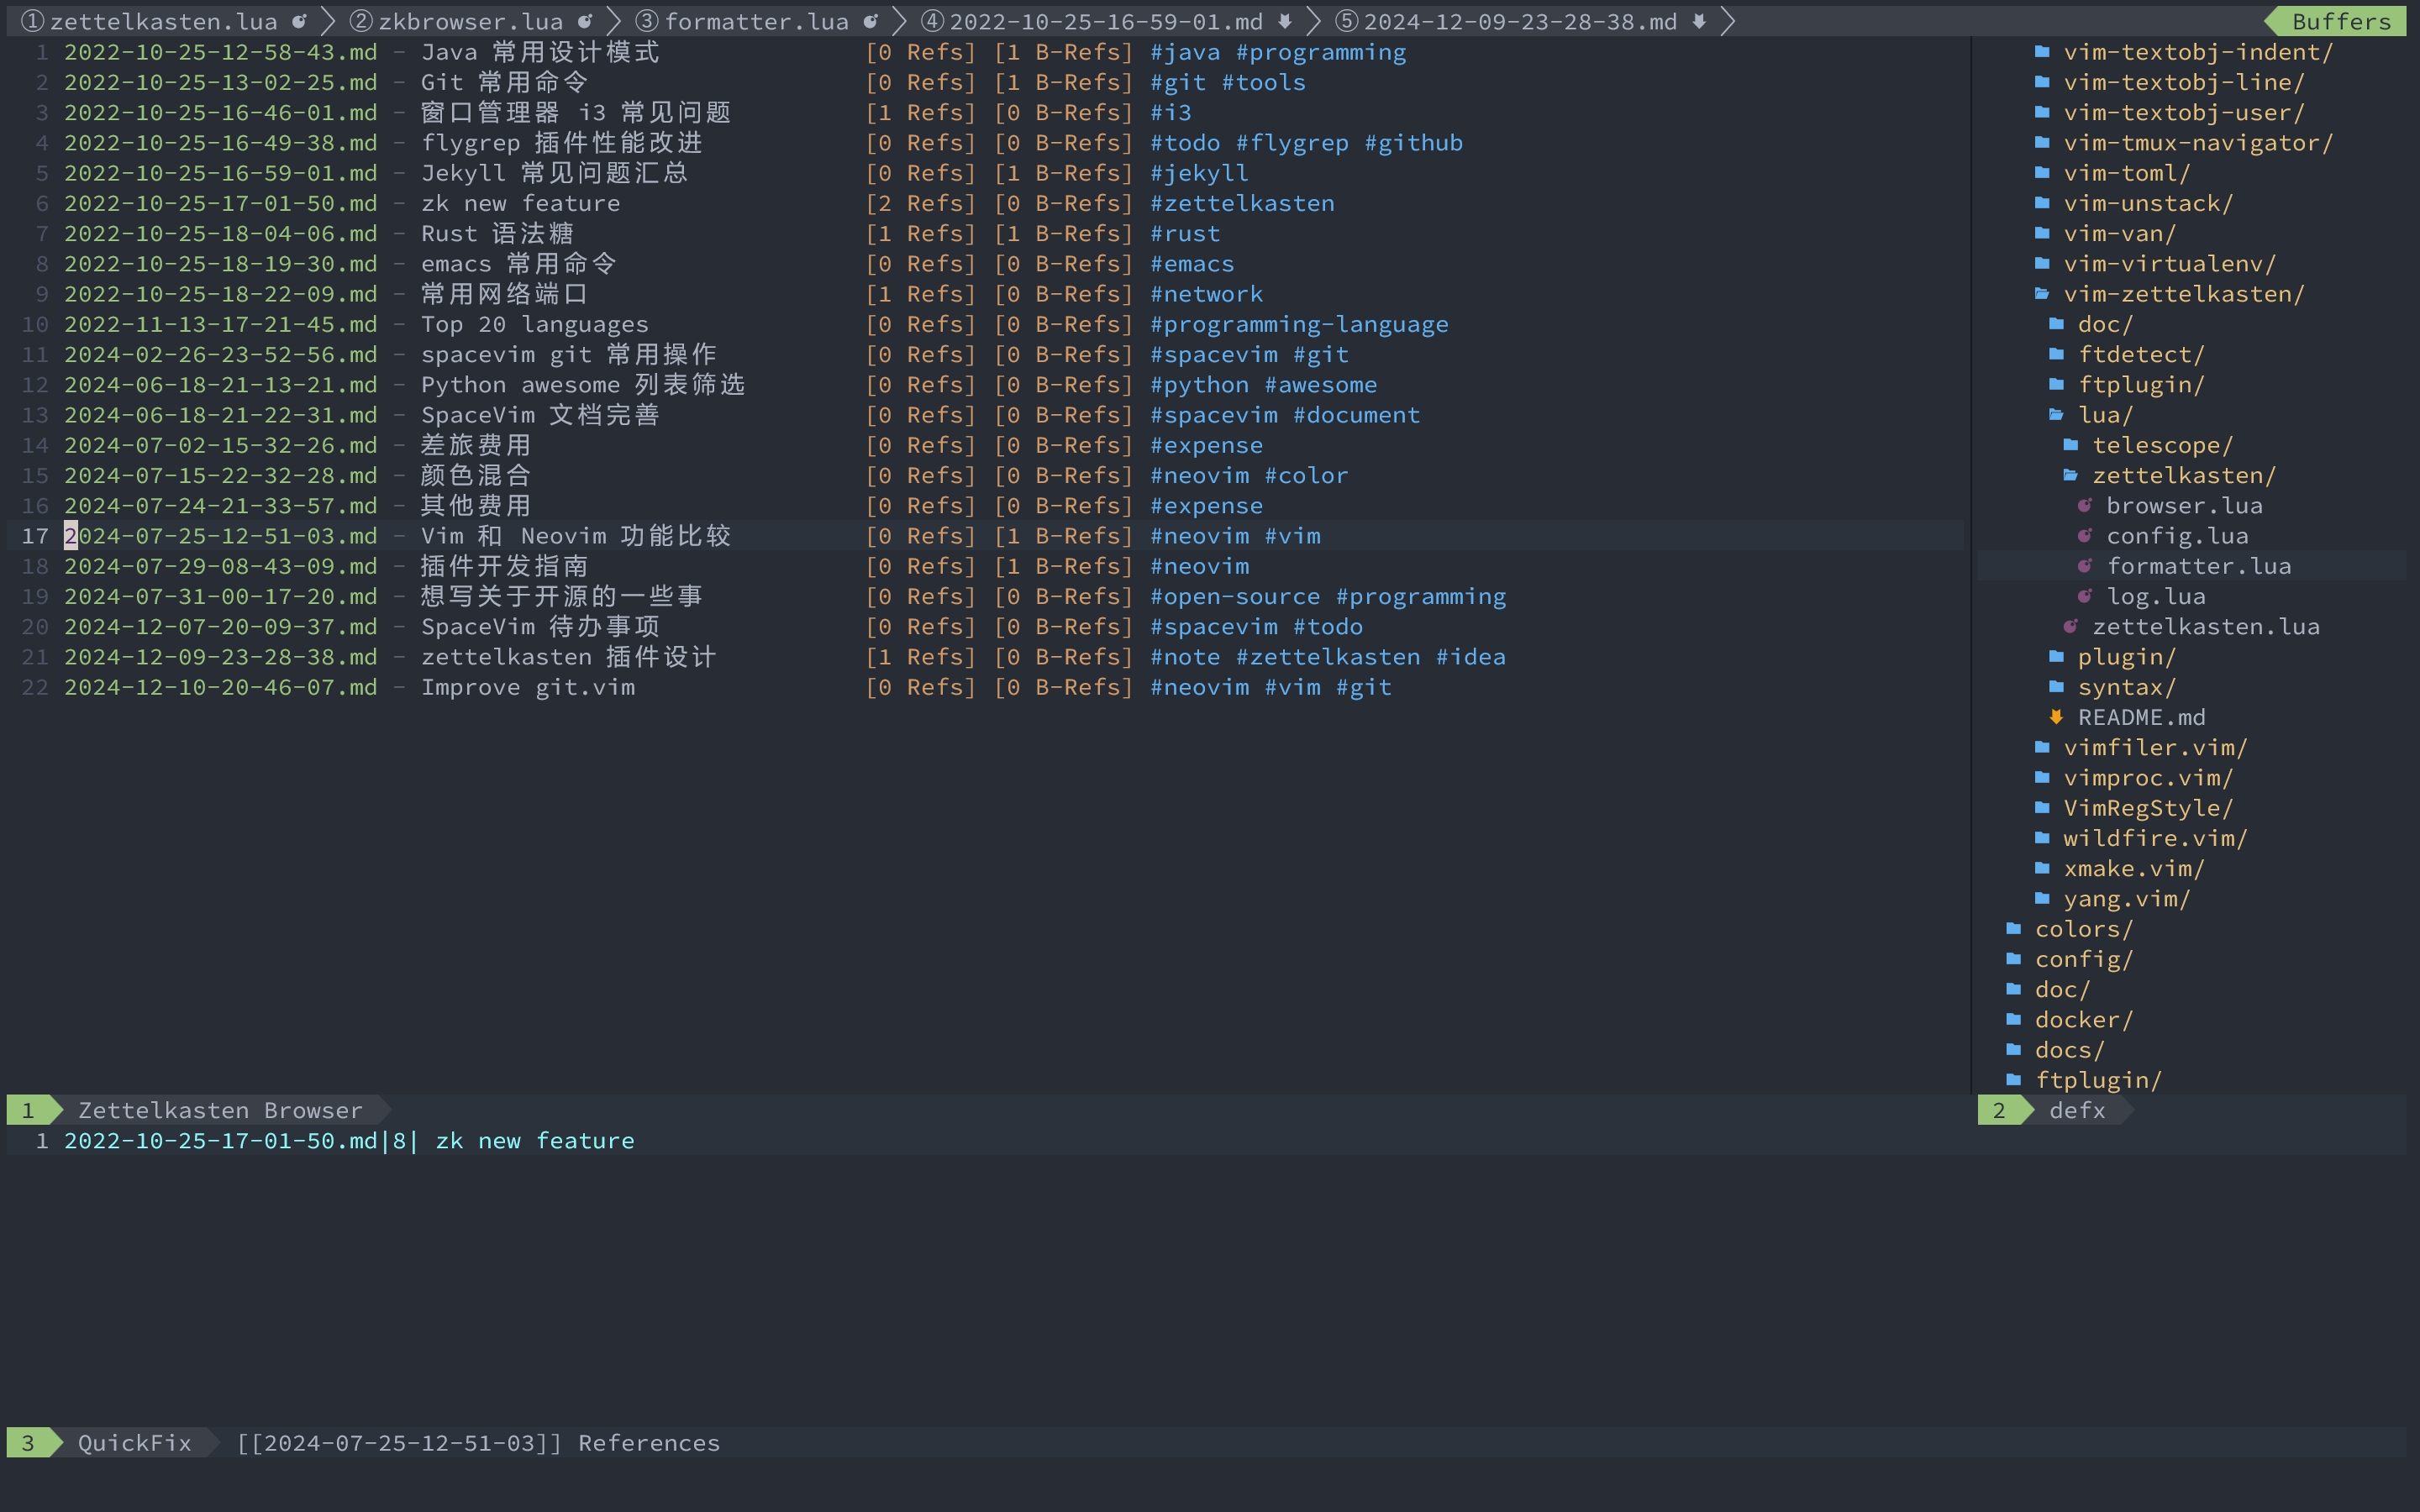
同时,在 ZkBrowser 窗口内支持的快捷键包括:
快捷键 功能描述 q退出 ZkBrowser 窗口 <LeftRelease>鼠标左键点击 Tag,筛选包含该 Tag 的笔记 gf打开光标 ID 下的笔记 Ctrl-l清除 Tags 筛选,列出所有笔记 Ctrl-]使用 preview-window 窗口预览笔记 [I使用 quickfix-window 列出 References F2打开 Tags 列表侧栏 侧栏的效果图如下,可以在侧栏窗口中使用回车键或者鼠标左键点击 Tag 实现筛选:
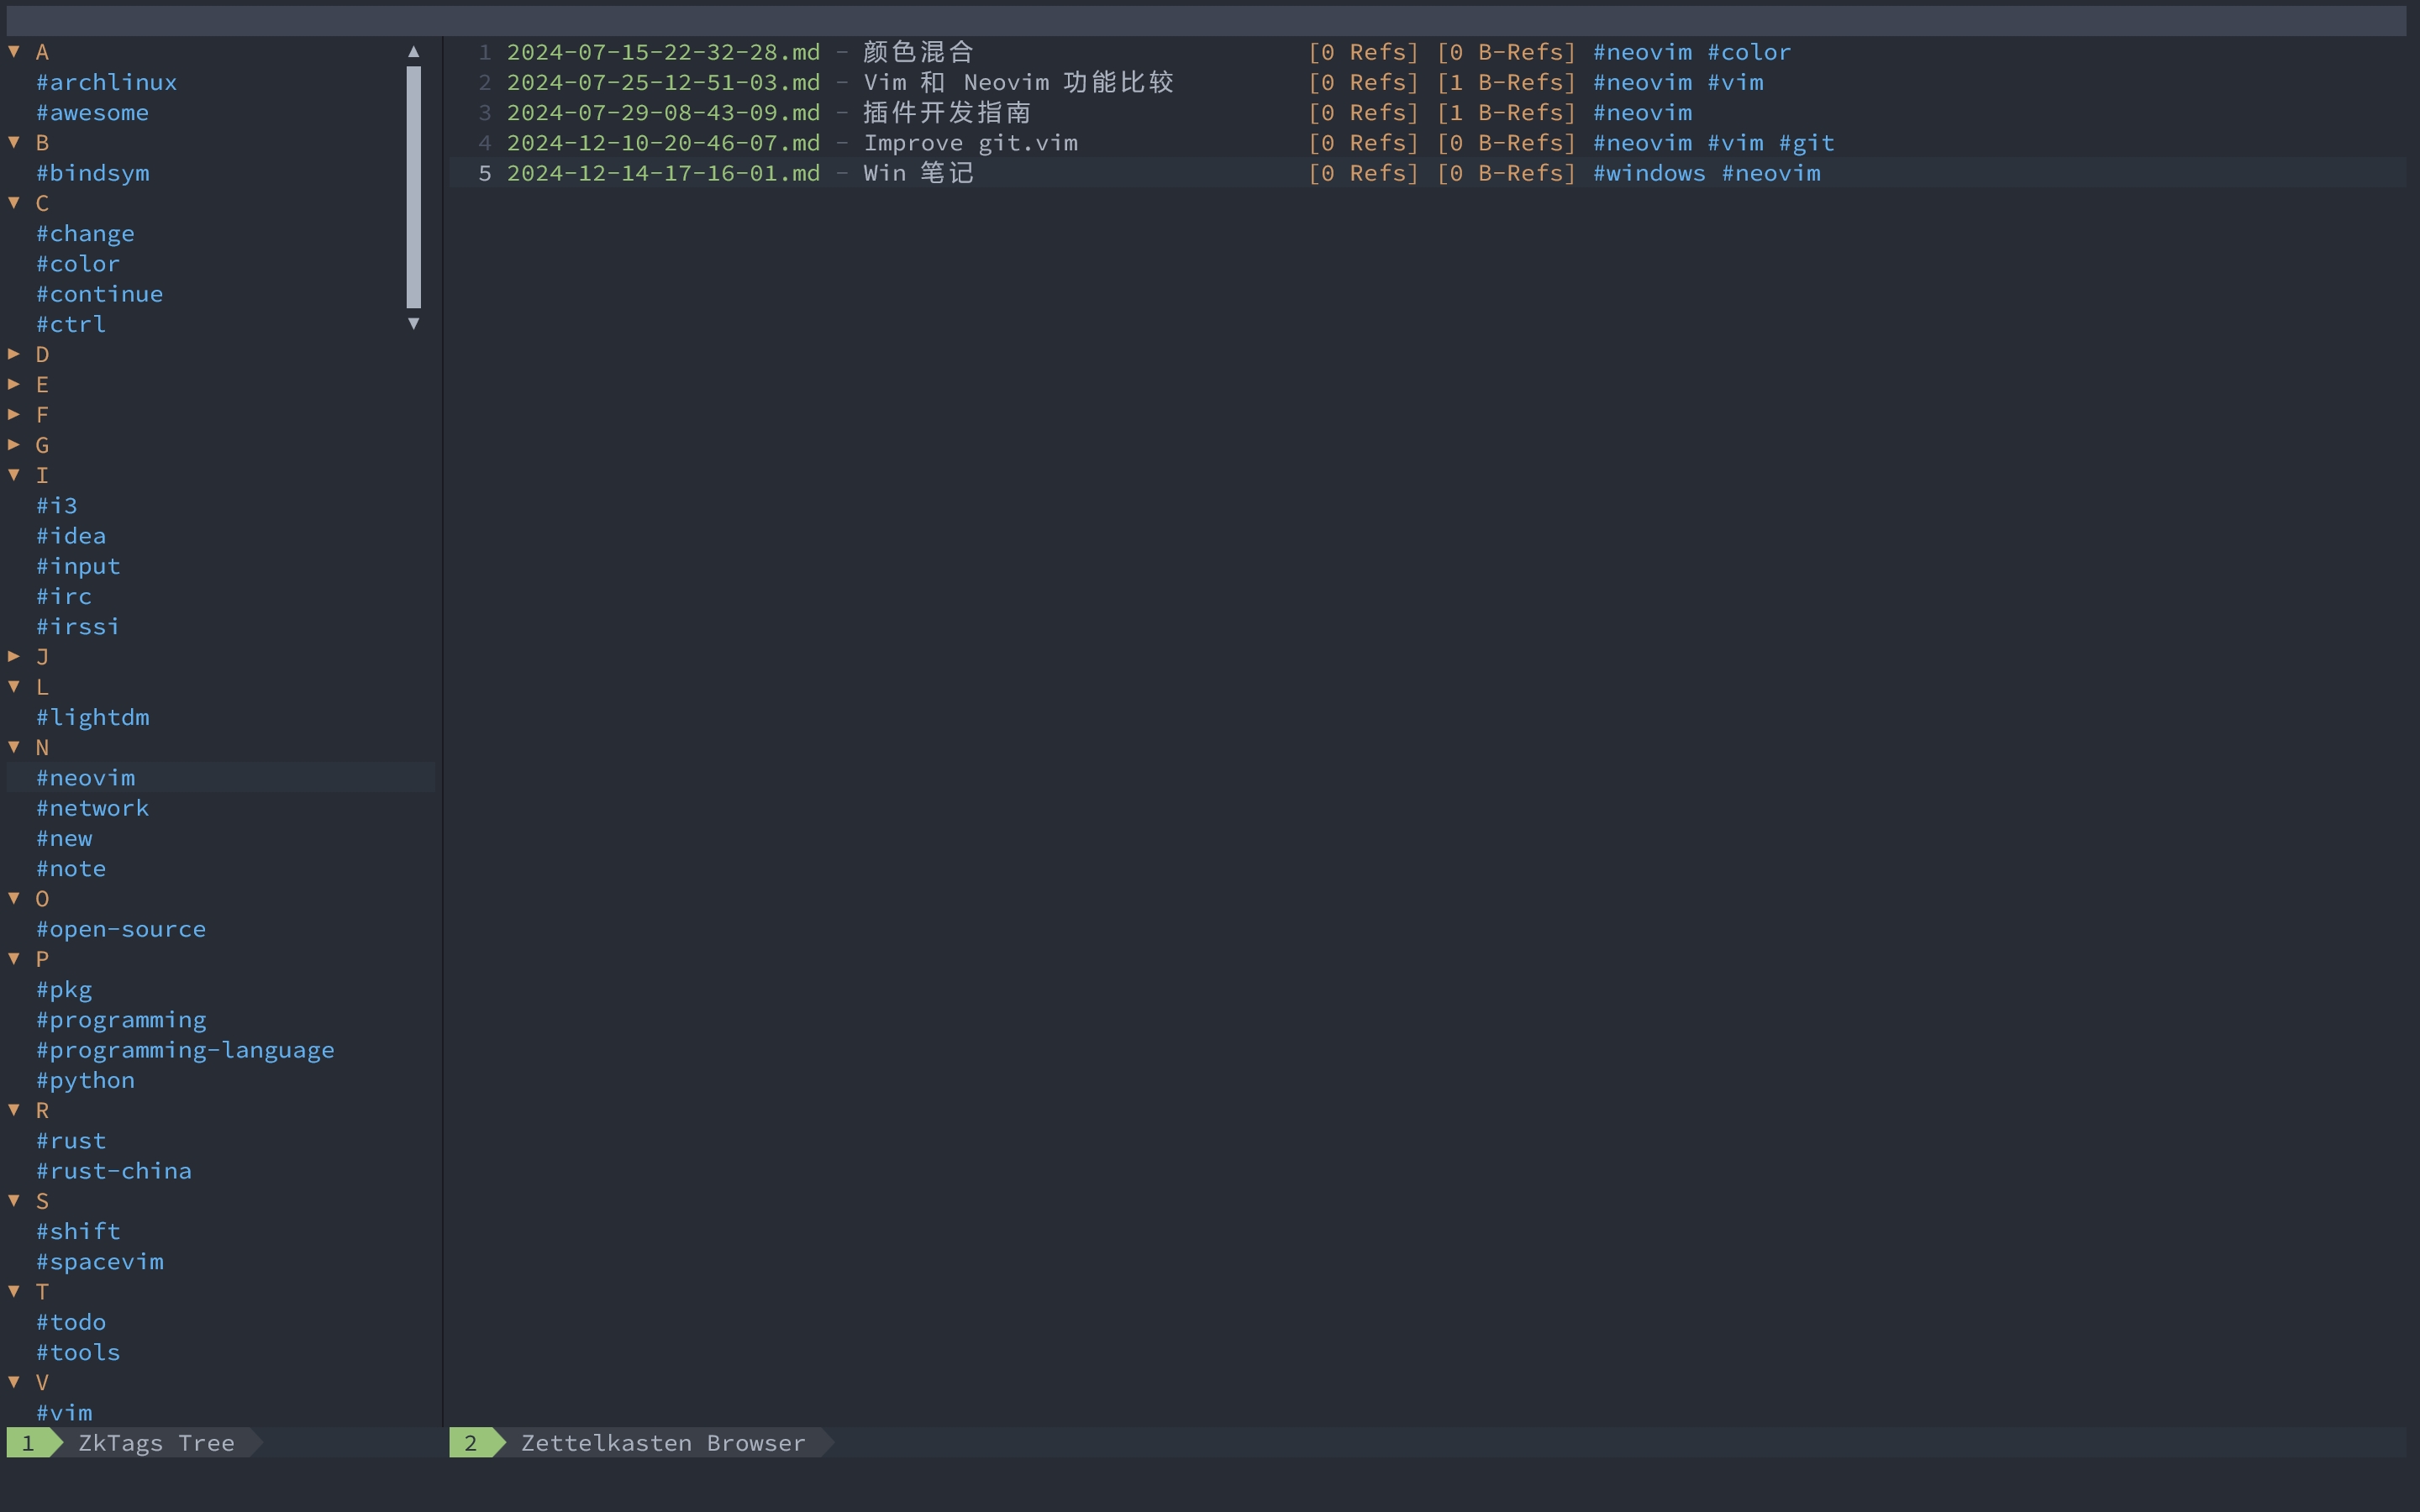
侧栏中,标签按照首字母归类,鼠标左键点击归类的字母,可以折叠这些标签。
使用 Telescope 检索 Tags
当笔记 Tags 非常多的时候,可以使用 telescope.nvim 进行检索,检索后默认的回车键行为是列出包含该 Tag 的所有笔记。 默认的快捷键为
SPC m z g。
使用 Telescope 检索标题
笔记的标题(Title)也可以使用 telescope.nvim 进行检索,默认的快捷键是
SPC m z f。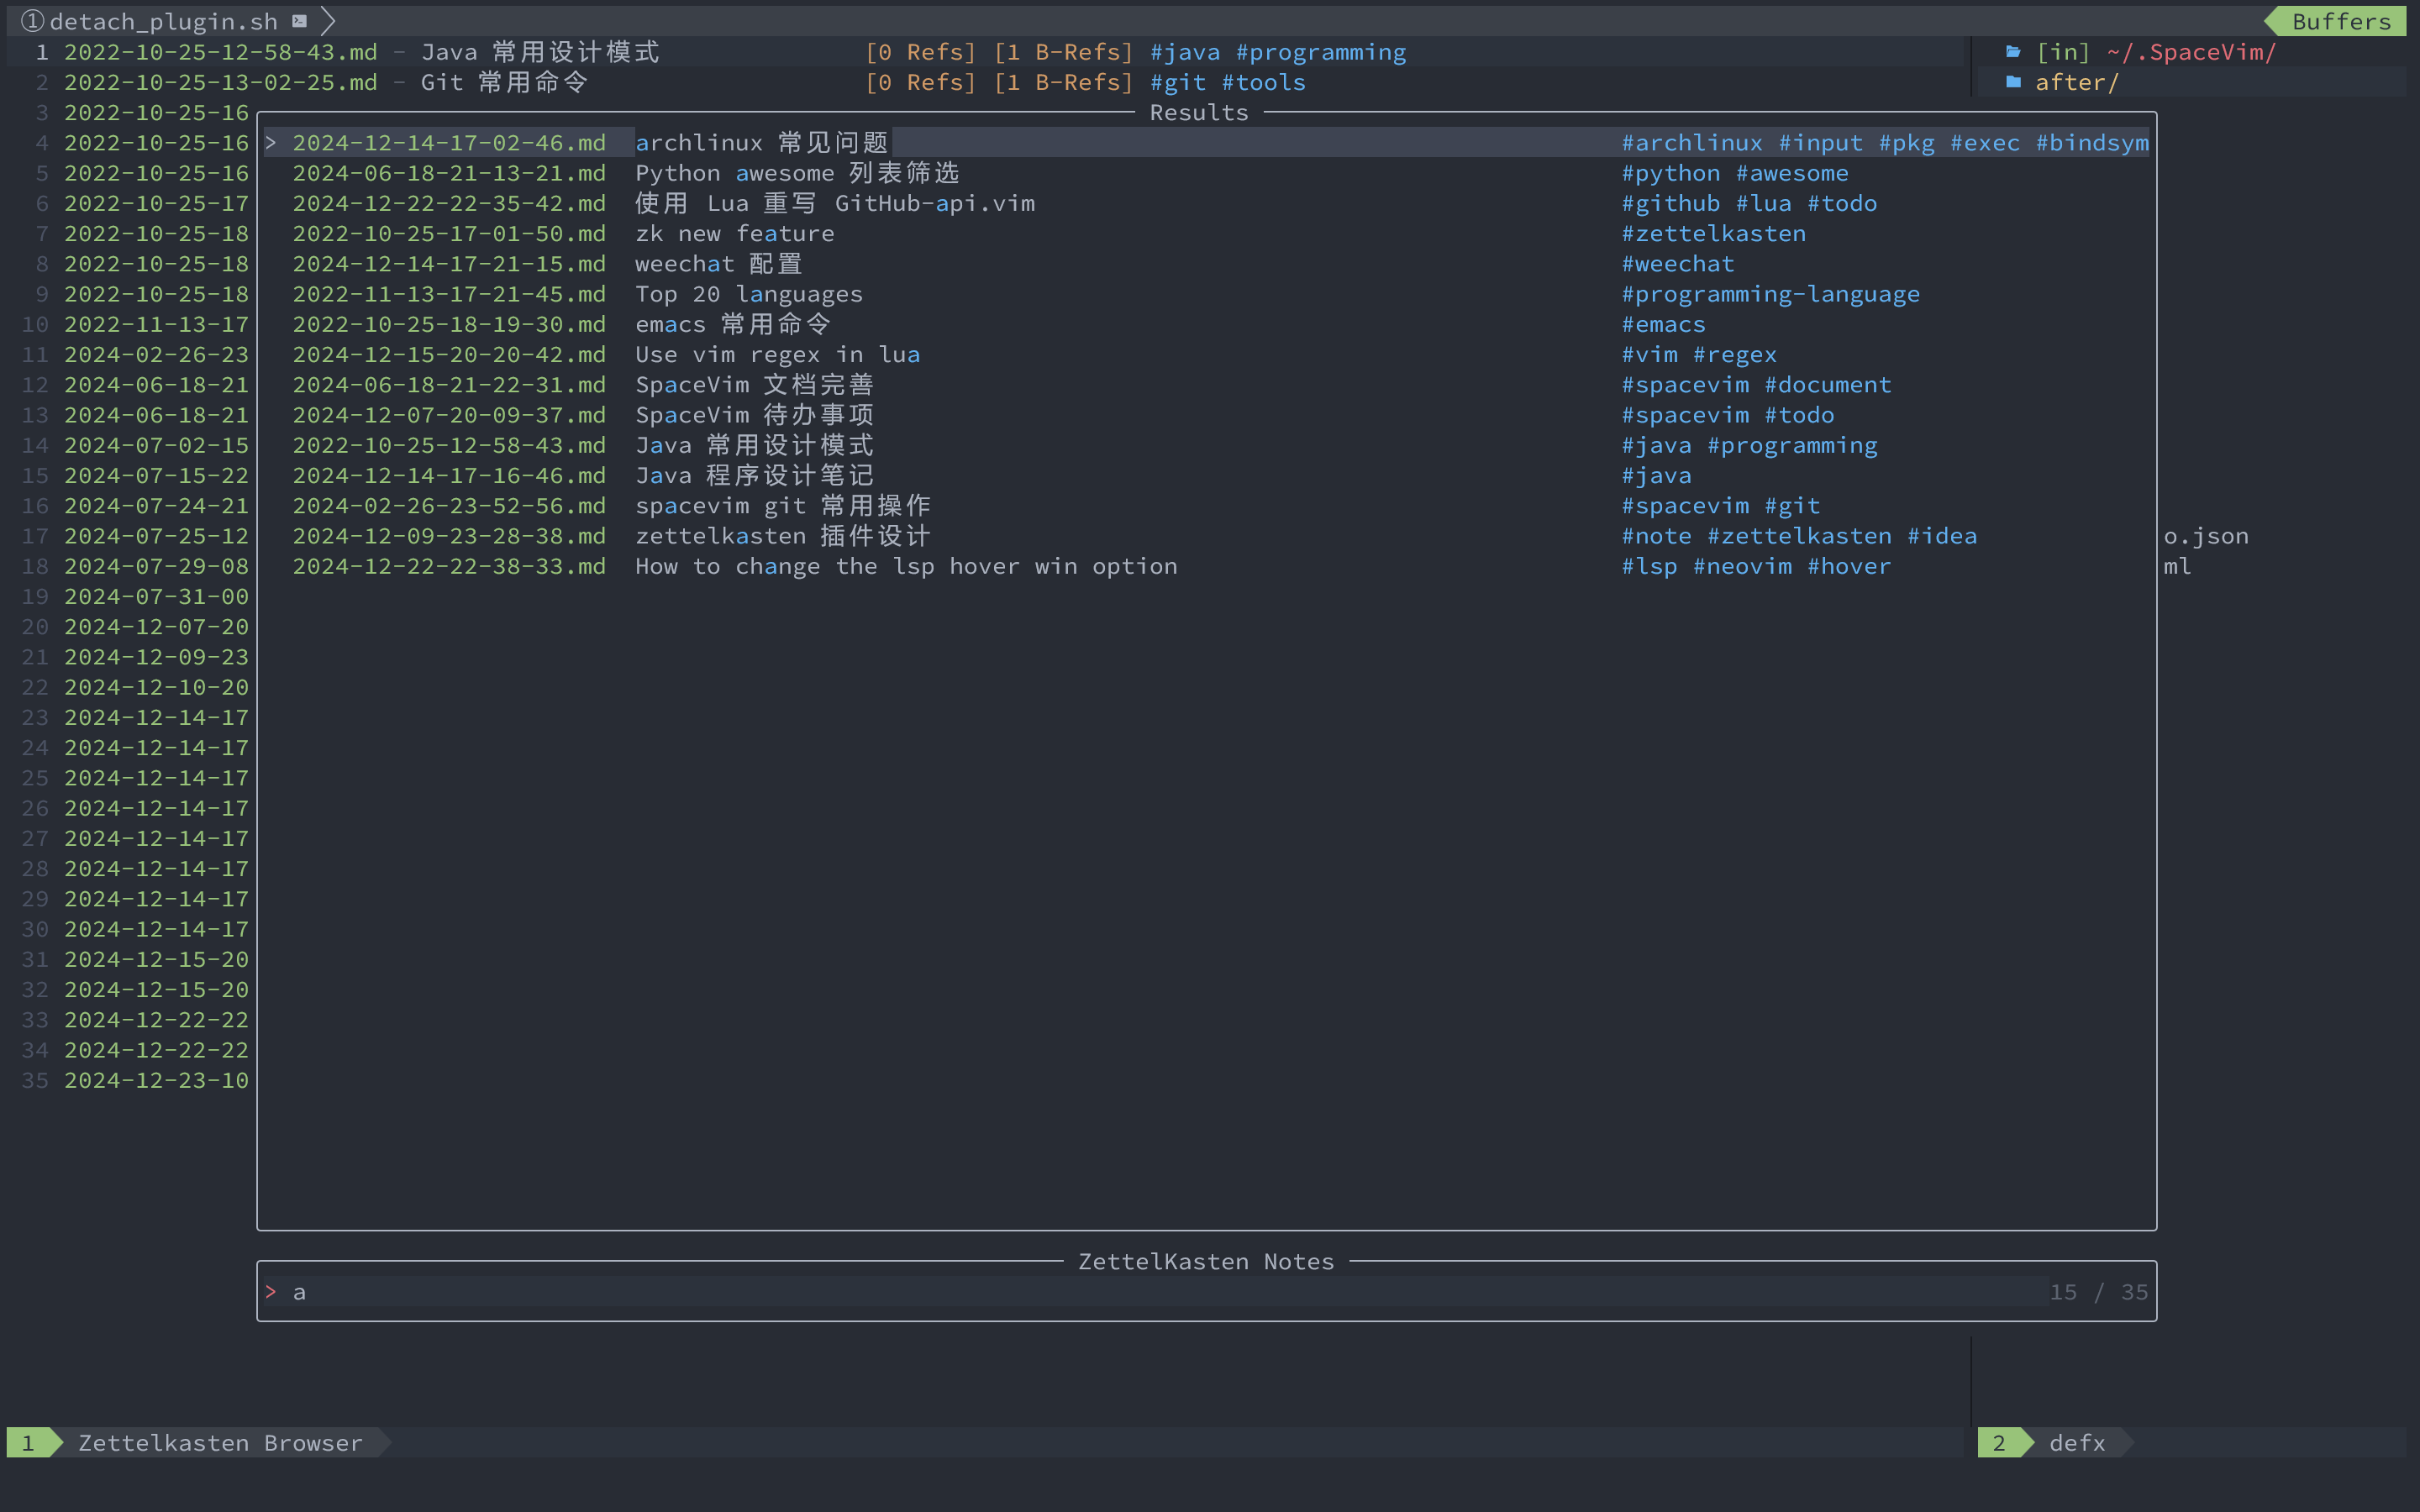
补全笔记 ID
在编辑笔记过程中,可以使用快捷键
ctrl-x ctrl-u来打开补全窗口,补全引用的笔记 ID。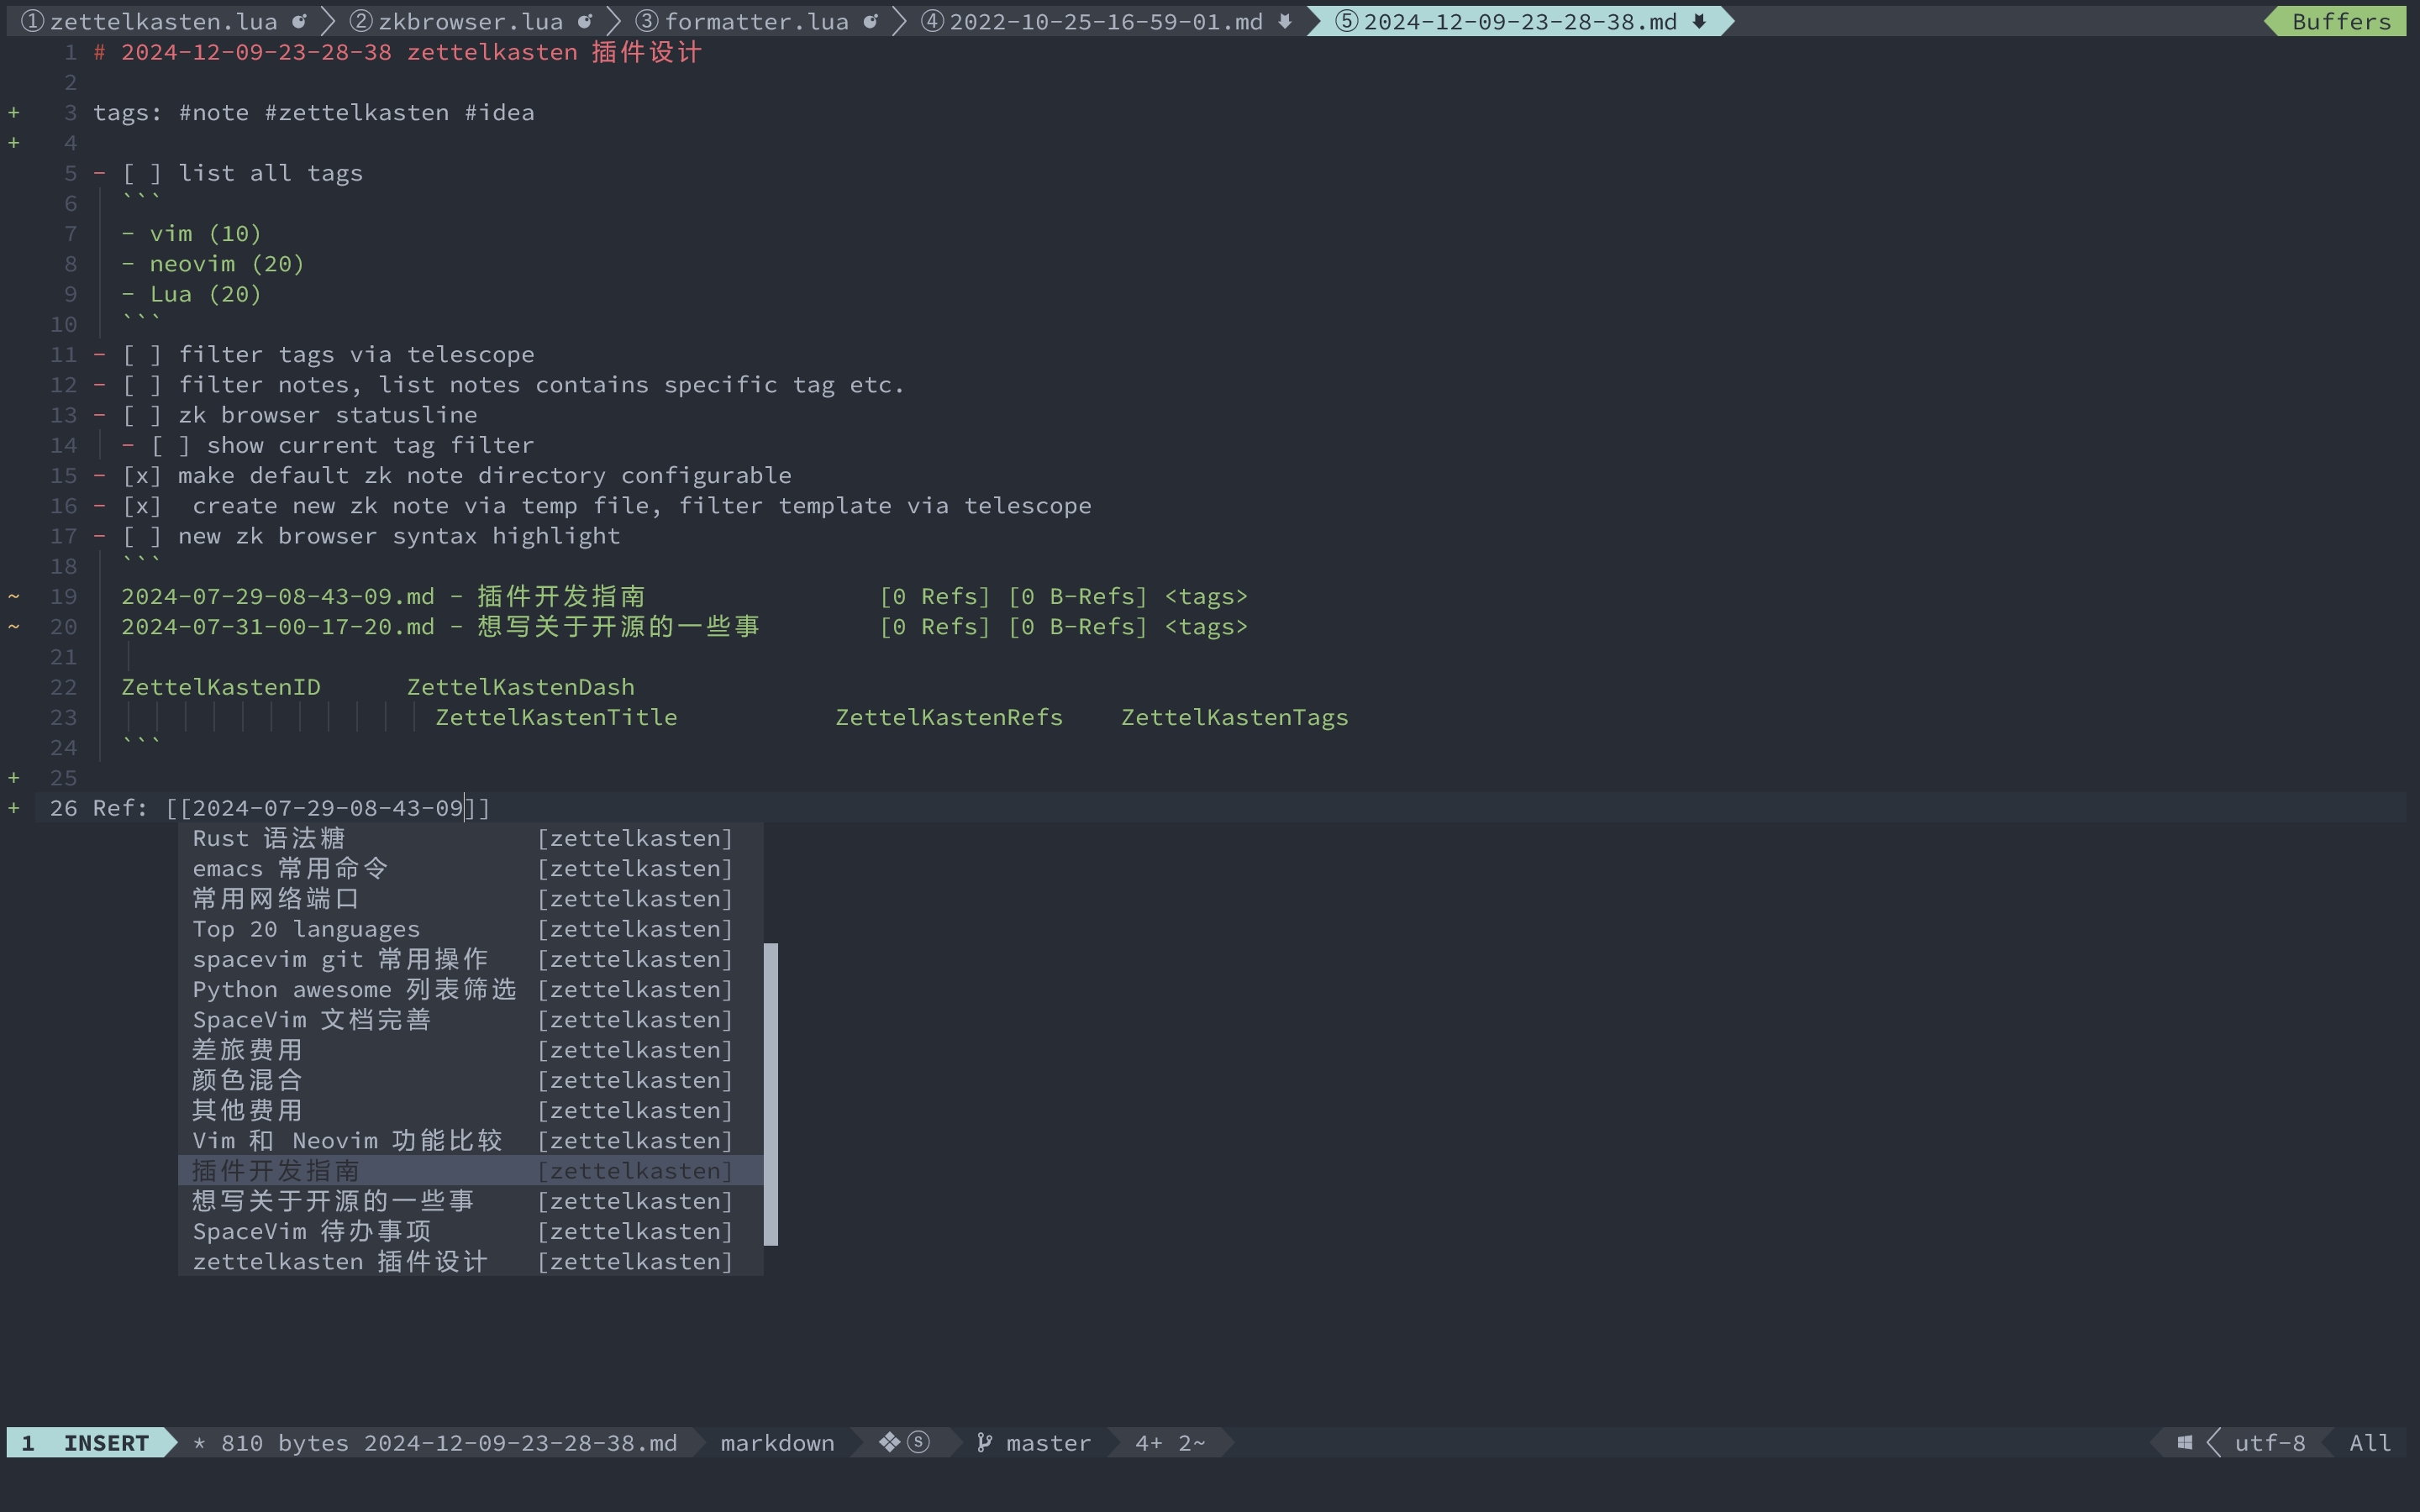
笔记模板的筛选
如果是使用 SpaceVim,可以通过 zettelkasten 模块选项设置笔记模板的文件夹,新建一些常用的笔记模板,比如:
[[layers]]
  name = 'zettelkasten'
  zettel_dir = 'D:\me\zettelkasten'
  zettel_template_dir = 'D:\me\zettelkasten_template'
通常基于默认新建笔记直接使用
SPC m z n快捷键即可,如果需要基于其他模板来新建,可以使用快捷键SPC m z t调用 Telescope 检索常用模板。Vim 的支持
因为 SpaceVim 默认是兼容 Neovim 和 Vim 的,因此后面是有计划让这个插件也支持 Vim 的,但是为了减少重复实现的一些代码,可能是需要 Vim 有
+lua特性。参考文章:
-
《好东西》观后感
新的工作环境感觉不是想象中那么理想,但是也在努力去适应。 最近感觉也比较压抑,本来周末想去看的一部电影,因为一些事情耽搁了,今晚抽空一个人去电影院看了。
正如电影的名字一样,即便是生活很多时候不是很如意,但是有些人还是很善于发现身边的一些“好东西”。
可能是因为自己工作的原因,很多时候太过追求结果,而忽略了过程中一些美好的事情。
关于“善意的谎言”
曾今的我一直固执的认为谎言就是谎言,没有善恶之分,因为总有方式更好地呈现事实。 但很多时候,一些善意的谎言其实可以让事情变得更加简单。
一些其他想法
其实,说实在的,电影不是特别的好看,很多情节、对话太过于刻意。 就感觉正常的两个人对话,不该是这样,很多时候刻意的制造一些“鸡汤”类的说教, 或者刻意的制造一些搞笑的对话。
但是,其中确实有很多“鸡汤”值得去好好想想,比如:
1、小女孩上台表演前的那段对话,有时候因为害怕别人的眼光、说辞、看法, 而退缩,其实,这个社会上,在意你的人,真的没有你想象的那么多。 可能明天,他就会忘记你所做的事。
2、又比如小孩的作文,我最喜欢的、以及出现了两次的跟幻想相关的话题。 我觉得小孩子还没有这样的思想,更多的是电影呈现给观众的一些观点。 是的,即便是现在,后面的生活,还有很多年,你永远不会知道自己最喜欢的将会是什么,还是要保留一些幻想。
-
《重生》:揭穿人性假面
周末跟家人们去看了一部电影,小朋友们选了柯南,我就去看了张家辉主演的《重生》。
剧中角色:
安渡(阮经天 饰)
安渡缉毒组小队长,被其舅舅安佩长期长期压抑不得势再加上自幼经历悲惨,造成了阴暗的性格,被权力、金钱迷失倒也正常。 人性这种东西其实很奇怪,不能去深究其好坏。
张耀(张家辉 饰)
张耀的剧情也算还能理解,想要在监狱里替换掉沙旺,并且通过各种检查,没有安渡他们的安排跟支持几乎不可能。
巴莱(马浴柯 饰)
完全没有想到的是南茜和巴莱也是也是提前安排好的碟中谍角色。
-
删除 Telegram 账号
前不久,删除了用了很久的 Telegram 账号
@wsdjeg。为了避免非本人使用该用户名带来不必要的麻烦,原来的用户名转移给了一个无管理员的公共的 Channel。
个人是非常抵触使用手机号注册和登录的软件,因为手机号实际上运营商是可以二次销售的。 大学期间至今,前面大概有三个手机号已经停机不用了,但是现在搜了下,居然有别人已经用它来注册了微信。
此外,如果提供足够的材料或者“特殊情况”下,运营商可以重新制作一张 SIM 卡,原 SIM 会废弃。 那么新卡就可以接受验证信息,这就意味着,对于账号的所有权,你没有绝对的控制权。
此外,删除 Telegram 另一个原因是在于自己,我想远离不必要的争执。不管是什么原因,有可能是对方问题。 也有可能是自己的问题。但是这些都并不重要,因为这种争执对于自己来说。似乎没有任何用处。只会徒增烦恼、浪费时间。
可能是因为匿名状态下更加肆无忌惮吧。
-
Vim Script 的新语法
对于 Vim Script 的语法的认知似乎还停留在 《笨方法学 Vim Script》的年代, 在接触 Neovim 以及使用 Lua 写插件之前一直都是使用 Vim Script。 即使是现在部分插件为了兼容 Vim,任然会使用 Vim 脚本实现一个兼容版本。 随着 Vim 版本的更新,实际上以及引入了很多新的语法格式。
字符串的连接符
查看了下自己以往写的 Vim 脚本,string 的连接符仍然是使用单个点,实际上 Vim 早就支持使用
..符号来连接字符串。let s:foo = 'abc' . 'def' " 可以改成 let s:foo = 'abc' .. 'def'函数的参数
在函数内部调用传入的参数,过往最常用的无外乎
a:0、a:000或者a:foo等等。a:实际上是一个dict变量, 可以看下具体包含哪些key:function! s:foo(x, y, ...) echom a: endfunction 1,2call s:foo(1, 2, 3)执行
so %输出如下:{'0': 1, '000': [3], '1': 3, 'y': 2, 'firstline': 1, 'x': 1, 'lastline': 2} {'0': 1, '000': [3], '1': 3, 'y': 2, 'firstline': 1, 'x': 1, 'lastline': 2}从上面的输出不难看出
a:字典变量中key包括:0: 可变参数数量, 可变参数是 1 个 3000: 可变参数组成的列表x或者y: 特定名称的参数
此外还有两个特殊
key值,firstline和lastline, 这个是传入的 range, 同时这意味着在定义函数时,参数名称不可以是firstline和lastline。 否则会有如下错误:E125: Illegal argument: firstline在 Vim 8.1.1310 中,增加了
optional-function-argument, 具体写法如下:function! s:foo(x, y = 3, ...) echom a: endfunction call s:foo(1){'0': 0, '000': [], 'y': 3, 'firstline': 1, 'x': 1, 'lastline': 1}上面的输出可以看出,在调用
s:foo函数时,虽然只传入了一个参数,但是在函数内部a:任然有一个ykey,其值为默认值3。闭包(closure)
闭包在其他很多编程语言里面都有类似的写法,可以理解为一个函数工厂,根据“环境变量”返回一个特定环境下的函数。 在 Vim 7.4.2120 中给
:function定义增加了 closure 属性。示例如下:function! s:foo(x) function! s:xy(y) closure return pow(a:y, a:x) endfunction return funcref('s:xy') endfunction let s:a = s:foo(2) let s:b = s:foo(3) echo s:a(2) echo s:b(2)若不使用
closure关键字,在函数s:xy内部是无法调用a:x的。其实,在 Lua 中也可以实现类似的功能:
local function foo(x)
  return function(y)
    return y^x
  end
end

local a = foo(2)
local b = foo(3)

print(a(2))
print(b(2))
以上两种输出结果都是:
4.0
8.0